This is just a brief post, I’m working on some tests for stuff and thought I’d share.
As I’ve tried to incorporate 3D models into my art, I’m finding the need to test in the physical mediums I work in just as important as testing the code I work with. For 3D printing I’m often trying to find a better way to arrange the model for a better finish, or I’m experimenting with finishing techniques. I’ve changed a lot about my process already just from these experiments. Here are a few changes I’ve made, and keep in mind these are all provisional.
Filament dryer
I love my vise, but my vise mars the crap out of everything. I found a model for jaw covers which I printed in TPU. My feeder kept getting jammed, though, so I sprung for a Creality Space Pi filament dryer. Once I dropped the temp to 210ºC and I used the filament dryer for four hours prior to print, I was able to successfully print the model in TPU.
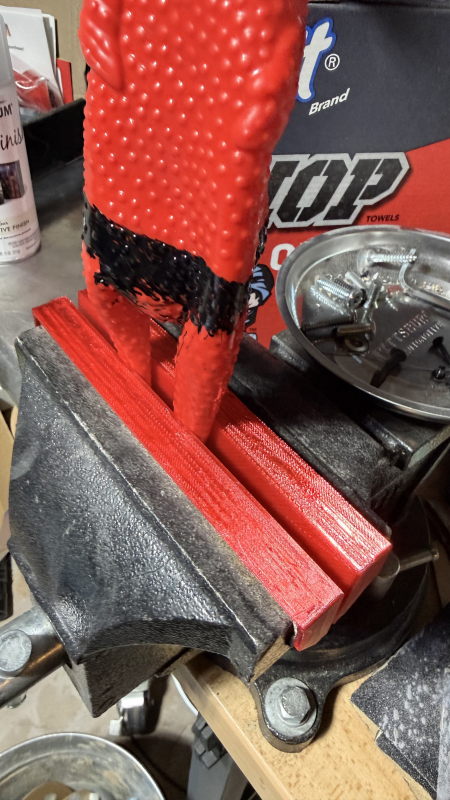
This was the first print that really required me to experiment a lot before I got a usable result. After several experiments, I’ve been using the dryer for everything. It’s easier to use than the roll arm that came with my printer, and it does lead to better results.
Sanding sucks, automotive filler primer is better
I’ll show you the results when I have them, but I’ve been finding Rustoleum’s automotive filler/primer to be incredibly helpful for models I use in art where the finish matters. It fills in the striping that is typically present on models, it’s cheap, it’s easy to apply, and you can sand it to the smoothness you want. If you mixed this with an enamel paint I bet you could even get a polished surface.
Reusable testing models
I’ve started a repository where I am building out test models for experiments. Here’s one I made for experimenting with finishing techniques!

This model (you’ll see I’ve got it doubled-up on the bed) gives me six different swatches I can use to test.
/**
 WARNING: Make sure that the dimensions will fit on your bed!
 **/

$fa=1;
$fs=0.4;
$fn=128;

// Sizes for the test patch
test_patch_thickness=4;
test_patch_width=30;
test_patch_length=30;
test_patch_segments=6;
test_separator_width=3;
test_separator_thickness=2;

label_depth=1;

module segment(index=0, is_last=false) {
    difference() {
        union() {
            cube([
                test_patch_width,
                test_patch_length,
                test_patch_thickness
            ]);
            if (is_last == false) {
                translate([test_patch_width,0,0]) cube([
                    test_separator_width,
                    test_patch_length,
                    test_separator_thickness
                ]);
            }
        }
        translate([
            1,
            1,
            test_patch_thickness-label_depth
        ])
            linear_extrude(label_depth+0.001) {
                text(index,size=3);
            }
    }
}

for (i = [0:test_patch_segments-1]) {
    x_offset=(i*test_patch_width)+(i*test_separator_width);
    translate([x_offset,0,0])
        segment(str(i), i >= (test_patch_segments-1));
}Code language: OpenSCAD (openscad)
In this model I’m making n swatches separated by 3mm boundaries. I’m also labeling the swatches to help track experiments as I go. I’m going to be testing some new paint markers on these.
One of them I’m going to use with automotive filler and the other one I’m going to just paint without the primer. The purpose of these is to use as little material as possible while allowing you to test techniques that will give you the outcome you’re looking for.
My experiments repository
Here’s my repository for experiments, you’re free to use it (GPLv3-or-later): https://codeberg.org/manchicken/experimental_scad_models
If you have any experimental models you’d like to contribute back, feel free to submit a PR or contact me with a link.
I’m going to do a post again soon with the outcome of the experiments. Thanks for reading.